How to Upscale Images for Print Without Losing Quality — LetsEnhance | TechScribe.in
LetsEnhance — upscale images for print
🔬 PRINT READY

How to Upscale Images for Print Without Losing Quality.
LetsEnhance Makes It Possible.

Stop dealing with blurry, pixelated final results. Learn exactly how to upscale images for print cleanly up to 16x — print-ready, without a designer, without Photoshop.

📐 16x Upscaling Factor
🖨️ Print Quality Optimization
⚡ Cloud Rendering Engine
📊 QUICK PRINT CALCULATOR

How Big Can You Safely Print Your Image?

Before you upscale images for print, you need to know how many pixels your target size actually requires. Use this clean target resolution chart to check your dimensions.

⚠️ THE PRINT QUALITY WALL

Why Standard Methods Fail at Large Format.
72 DPI looks fine on screen. Print demands 300 DPI.

Before sending another image to the print shop, understand the problem. Stretching a small image just makes pixels bigger. True resolution enhancement reconstructs actual detail. Here is why standard methods fail and how AI changes the game.

🖨️Blurry large-format prints
Web images are 72 DPI — print needs 300 DPI minimum. Standard upscaling cannot bridge this gap.
📦Product photos too small
Your best shot is 800px — the billboard needs 8,000px. Traditional upscaling just enlarges pixels.
😬Pixelated hero banners
When resolution is too low, the final print looks cheap and amateur.
No time to reshoot
Deadlines are tight. Photographers are unavailable. You need a solution that works in minutes.
THE LETSENHANCE FIX

Three AI Models to Upscale Images for Print.
Pick the right one. Get print-ready results cleanly.

LetsEnhance doesn't just stretch pixels; it uses targeted neural networks trained on specific textures. Choosing the wrong model will give you a plasticky or blurry print. Here is exactly how to choose your engine.

📷
The Prime Model — For Photos and Product Images
This is your workhorse for real-world textures. It reconstructs missing data based on sharp physical edges—like skin pores, fabric weaves, and small text on packaging labels. It avoids the "hallucination" trap, making it the only safe choice for e-commerce or commercial prints where accuracy is non-negotiable.
🎨
The Digital Art Model — For AI-Generated Images
Midjourney, DALL-E, and FLUX images look great on glass, but when printed, their unique compression artifacts look messy. This model specifically targets and flattens surreal blending patches, noise patterns, and stray pixels, leaving clean vectors and smooth gradients that commercial ink jet plotters can read without choking.
📜
The Old Photo Model — For Damaged or Archival Images
Unlike digital noise, physical grain and age scratches require healing algorithms. This model runs a face-restoration pass alongside scratch removal, making it ideal for scanning family heirlooms or archival history projects that need to be scaled up for gallery exhibitions.

Step-by-Step Guide: How to Upscale Images for Print

Don't just upload and hope for the best. To ensure your print shop doesn't reject your file for low density, follow this precise production pipeline.

Step 01 / Source Check Time: 30 Seconds

Clean the Source File

Before uploading, ensure you aren't working on a double-compressed WhatsApp screenshot or a thumbnail. Check the file properties. If your starting file is under 500KB, you will need a 4x or even 8x custom upscale factor to generate the raw pixel density required for a standard print.

Before setup: Preparing to upscale images for print using AI configurations 
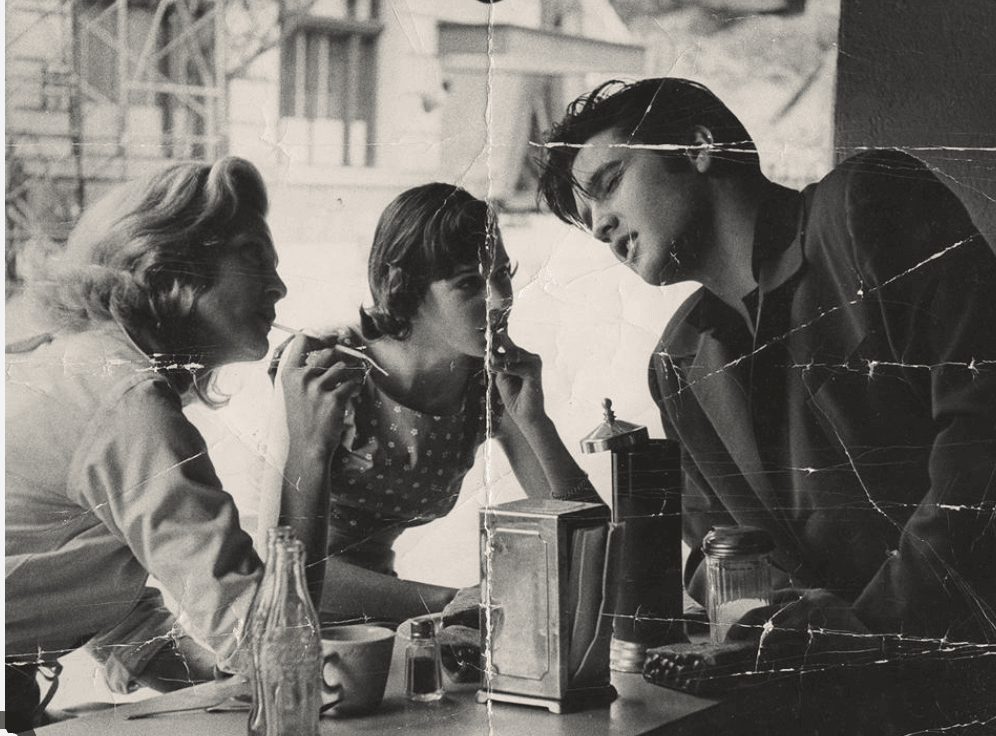
Evaluating compression noise on the raw low-resolution asset.
Step 02 / Core Configuration Time: 45 Seconds

Select the Model and Scale Factor

Drop your image into the workspace. On the right-hand settings panel, select your processing type. For photography, click Upscale -> Photos -> Prime. Under size settings, select your output multiplier. Refer to our Quick Print Calculator above: if you need to print an 11" x 14" poster from a small web asset, select a minimum of 4x enlargement.

Step 03 / Density Adjustment Time: 20 Seconds

Toggle the 300 DPI Printing Preset

This is the step most people overlook. Screens read files at 72 dots per inch; physical paper demands 300. In the output preferences, turn on the Print Preset toggle. This tells the algorithm to change the file's metadata header information, automatically embedding the target print size directly into the file layout so the print shop's software opens it correctly without scaling distortion.

Step 04 / Export Cleanly Time: 60 Seconds

Render and Export as Lossless PNG or TIFF

Click the Start Processing button. The cloud GPUs will render the image inside a localized container. Once ready, download the file. **Crucial Print Tip:** Save your final down-stream asset as a lossless PNG or uncompressed TIFF file. Avoid saving it as a heavy-compression JPEG, which instantly reintroduces blocky artifacts onto your newly upscaled edges before it hits the printer rollers.

After completion: Successfully managed to upscale images for print cleanly up to 300 DPI 
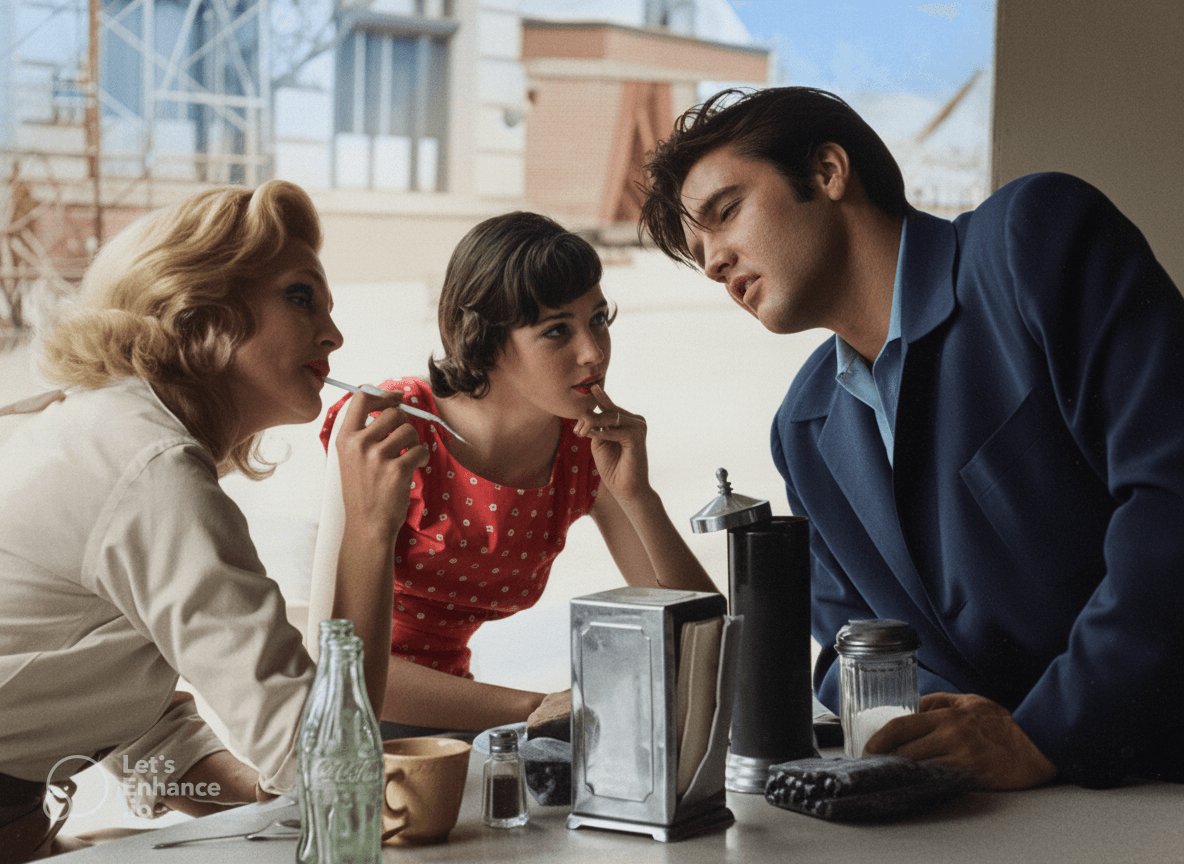
Finished asset output with restored micro-textures, ready for commercial production.
WHO NEEDS THIS

Perfect for Designers, Photographers, and E-Commerce Sellers.

Knowing how to upscale images for print outputs separates professional layout results from amateur design disasters. Here is who benefits most from AI-powered enhancement.

🖨️
Billboard and large-format print
Upscales to 512MP — the ceiling no other cloud tool matches.
🛒
Low-resolution product photos
The Prime model reconstructs detail for catalogs and packaging.
🎨
AI-generated commercial images
Digital Art model removes artifacts for professional deployment.
📸
Old or damaged photo restoration
The Old Photo model repairs scratches and restores colour.
📦
Large image catalog management
Batch processing handles hundreds of images without manual work.

Always Prepare Your Files Before Submitting to a Printer

Printers charge for rejected files. Low-resolution images get rejected or produce poor results. Preparing your files before submission guarantees acceptance and quality. Most print shops recommend solid density preparation — LetsEnhance delivers exactly that.

Not the right fit for everything
Need 100+ creative models and ControlNet precision?
LetsEnhance specialises in upscaling but is not a dedicated creative studio. For generating original visuals with full model control → See how OpenArt AI handles creative image generation →

Need e-commerce scene relighting and product background replacement?
LetsEnhance handles resolution — but Phot.AI goes deeper with realistic shadow casting specifically for product sellers → See how Phot.AI handles product photography →
💡 PRINT ENGINE KNOWLEDGE

Frequently Asked Questions

How do you upscale images for print cleanly?

To upscale images for print, upload your file to LetsEnhance, select the Prime Model for real photos or the Digital Art Model for AI images, choose a 4x or 16x scale factor, enable the print layout preset to fix density limits, and download your high-resolution asset.

What is the best way to prepare images for large format printing?

The best approach avoids raw bilinear stretching (which creates blurry halos) and uses AI-powered neural networks like LetsEnhance that intelligently reconstruct missing edge data. Preserving real micro-textures prevents a plasticky look on massive banners.

What image types work best with LetsEnhance?

LetsEnhance runs distinct specialized configurations: the Prime Model handles standard lifestyle photos and e-commerce product listings, the Digital Art Model scrubs noise artifacts from generative engines, and the Old Photo Model fixes historical scan files.

💡 THE BOTTOM LINE
Want to upscale images for print without losing quality?
LetsEnhance is the most reliable way to get print-ready results — no designer, no Photoshop, no GPU required.

Learning proper image preparation is an essential skill for anyone producing physical media. The tools that quietly and consistently do their job — without hallucinating detail, without requiring installation — are the ones that compound in value over time.

Upload your most challenging image. Select the right model. See what print-ready actually looks like.
Upscale images for print with LetsEnhance Try LetsEnhance Free →

Back to Top